
![[AD - Press visit]
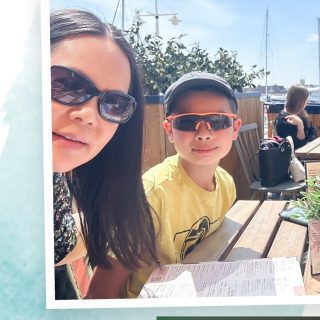
We enjoyed the glorious sunshine this weekend with a trip to Brighton. We went on the @brightoni360official which is right by the sea front.
The i360 pod take a slow journey up, allowing you to take in views across Brighton and the South Downs 450ft above ground. There’s a bar inside with drinks and snacks available to purchase and the experience lasts 25 minutes.
Afterwards, we headed to the open air roller rink for a roller skating session!
The roller rink is:
⭐ Suitable for over 5s
⭐ £6.50 if you have your own skates or £9.50 if you need to hire them
⭐ 45 minutes per session
Full details to visit the i360 + skating
📍 Brighton i360, Lower Kings Road, Brighton BN1 2LN
🚗 Parking nearby (we parked in the Regency Square Car park)
🎟️ Prices start from £25.40 for an adult and £16.90 for a child
🕐 Opening hours are currently Sun-Fri 10.30am-18.30pm and until 19.30pm on Saturdays
☕️ Bar inside the i360, cafe and gift shop
Book tickets here:
https://tickets.brightoni360.co.uk/tickets/?_ga=2.195305772.1869001490.1689671753-1757164059.1689671753/#events?eventid=157](https://storage.googleapis.com/stateless-www-suburban-mum-com/2024/03/28f4385e-417980235_313576471048632_3682382982231216432_n-180x320.jpg)
![[AD] ***Summer of fun at Barracudas Activity Camps!****
There is plenty for kids to do at @barracudas_activity_day_camps
From Tennis, Archery, Swimming, Motor Sports and more you can be sure that there will be something for kids aged 4.5-14. ⚽🏈🥅🎾🏓🏎️🏹🏊♂️🏉
You can book on a day by day basis - so it can fit in with any other days out/activities you have planned and there are early drop off and late pickup options available. Barracudas are also Ofsted registered so you can use your Childcare Vouchers too.
⭐⭐⭐Get £20 off a week or £4 off a day using my discount code: MARIA20⭐⭐⭐
#BarracudasActivityDayCamp #BarracudasActivityCamp #BarracudaAmbassadors #SummerHolidays #SchoolHolidays #Summer2023 #SummerCamp #DayCare #Camp #KidsCamp #surreymummy #surreymums #SummerOfFun #ActivityCamps #HolidayCamps #Childcare #SchoolHolidays #schoolholidaycamps](https://storage.googleapis.com/stateless-www-suburban-mum-com/2024/03/5e860bed-353583570_625625966167953_545896259645102575_n-180x320.jpg)


![[AD] We have some super exciting news...we have been chosen to be Laser Quest Ambassadors, and the boys are over the moon!
We are really lucky that our local Laser Quest (@laserquestkingston) is just around the corner from us. It means we can pop in of a weekend or anytime during the school holidays, and with summer just around the corner, I know Laser Quest will be one of our go-to places for some family fun.
As well as games of Laser Quest, there are also VR experiences and arcade amusements too. To find out a bit more about how Laser Quest works, you can read my blog post: https://www.suburban-mum.com/laser-quest-kingston/ (clickable link in bio)
Don't forget to keep an eye out for our Laser Quest posts - I'm going to be giving away two family passes to use at Laserquest Kingston!
If you can't wait and want to head down to Laser Quest to try it out, use the code SUMMER30 for 30% off your booking. The code is valid from now until the end of August 2023 and can be used on Laser Quest games and birthday party bookings.
#LaserquestAmbassador #Laserquest #LaserquestKingston #ActivitiesForKids #FamilyFun #DaysOutWithKids #Lasertag #LaserquestVR #Kingston #ThingsToDoInKingston #SurreyFamilyDaysOut #ThingsToDoWithKids #RainyDayFun #SurreyMummy #SurreyLife #LifeWithKids #LifeWithBoys #familyfunday](https://storage.googleapis.com/stateless-www-suburban-mum-com/2024/03/8aee7c64-353230107_797358078406942_2405522556733455165_n-320x320.jpg)

![[AD] The sun has finally made an appearance and the boys have been making the most of it by spending it
in the garden.
They’re go-to is always football and they’ve been trying to improve their aim and accuracy with the new Messi Foldable Footlball goal from the #MessiTrainingSystem range.
I love the fact the goal is foldable, making it easy to store away when not in use. It is also lightweight so you can effortlessly pack it up and take it to the park or to a friend’s house.
The Messi Foldable Football Goal retails at £36 and can be purchased from @argos
You can read my full review here: https://www.suburban-mum.com/messi-foldable-football-goal/
#TrainLikeMessi #FoldableFootballGoal #FootballSkills #OutdoorFun #LionelMessi #LeoMessi #FootballAtHome #OutdoorKids #JustGetOutside #OutdoorsAndFree #ScreenFreeKids #WhateverTheWeatherKids @flair_gp](https://storage.googleapis.com/stateless-www-suburban-mum-com/2024/03/0977c2ca-341194882_615024710178056_41977149395989448_n-180x320.jpg)

![[AD] We are absolutely thrilled to announce that we are Barracuda Ambassadors again this year.
With Easter just around the corner, the boys were sent the @barracudas_activity_day_camps new camp kit in preparation for the school holidays.
There’s a wide range of activities for kids aged 4.5 - 14 including Tennis, Archery, Basketball, Arts & Crafts and more.
If you like the sound of Barracudas, find out more over on their website. You can also save £20 a week or £4 a day, using my discount code: MARIA20](https://storage.googleapis.com/stateless-www-suburban-mum-com/2023/03/aa004e9d-337327232_3347621672145747_6958750057427557935_n-180x320.jpg)


![[AD - Gifted]
Last weekend we were invited to try out @tsarettaspice’s new Bottomless Brunch menu and I can tell you it was thumbs up all round!
There’s a good choice tapas on offer from Punjabi fish fingers, Indo Chinese Chicken to Spiced Lamb Scotch Eggs and Manchurian Cauliflower (which was amazing!)
If you’re local to Twickenham and fancy giving them a try here’s are the details.
Tsaretta Spice Bottomless Brunch
⭐️£37.50 per head for bottomless Prosecco or cocktail of the day
⭐️£55 per head for bottomless Champagne
⭐️ Food included: 4 tapas selections and dessert or 2 tapas selections, a pav or naanwich and dessert
⭐️ Non-alcohol brunch is also available
Tsaretta Spice
55 Church Street
Twickenham
TW1 3NR
You can also read our full review over on the blog (link in bio)](https://storage.googleapis.com/stateless-www-suburban-mum-com/2023/03/d63fb514-333324764_3585822551653806_1461730182166520034_n-180x320.jpg)
![[AD] What does family look like for you?
I am fortunate to be surrounded by strong, powerful women in the form of my mum, sister and mother-in-law (along with many others). With Mother’s Day just around the corner, @BootsUK want to celebrate all the different mums and mother figures we are lucky enough to have in our lives. They have a huge range of Mother’s Day gifts to choose from so we can show them how much they mean to us. (swipe to take a look at some of my choices)
If you want to express love and appreciation for the mother figure(s) in your life, head to Boots.com to find the ideal gift. They have a whole host of gifts, so you can be sure to find something to suit all tastes. Celebrate the #LoveForAllMums this Mother’s Day with Boots.
](https://storage.googleapis.com/stateless-www-suburban-mum-com/2023/03/a8f9bd79-334276459_136658625736352_6403224988403337253_n-320x320.jpg)

![📚 Are you ready for World Book Day? 📚
[AD - Gifted] I don't know about you, but I have never made the boys a costume for #WorldBookDay. I just don't have it in me to be creative that way. Their costumes have always been bought or cobbled together with what we already have, and luckily, the school allow you to wear pyjamas to school, which makes things a lot easier!
M has been living in his @TheRealTomGates pyjamas recently, and I think he might wear these when his World Book Day dress-up day comes around (the school celebrate with Book Week rather than just Book Day)
The boys have been fans of Tom Gates for a while now. M has always loved reading books that make him laugh and contain humour - they tend to keep him engaged in reading.
Did you know that there are now 20 Tom Gates storybooks to get stuck into? Ideal for kids aged 6-12, the series consists of feel-good, hilarious books full of photos and stories about Tom's life at home and school. Best of all, you can read them in any order.
The latest book is Tom Gates: Happy to Help (Eventually), and along with the pyjamas, you can pick them up from @GeorgeAtAsda just in time for World Book Day!
There's also a range of Tom Gates items, including games, puzzles and greeting cards at major retailers.
](https://storage.googleapis.com/stateless-www-suburban-mum-com/2023/03/8ddc1d60-333834012_233243062459121_4168822235387052550_n-320x320.jpg)


![[AD - Gifted]
We went to check out the newly opened @laserquestkingston last week.
Laser Quest, VR Experiences and Arcades all under one roof means only one thing - bundles of fun and games for the kids at really affordable prices.
Laser Quest games start from just £7.95 but you can also buy a Laserquest and VR Experience combo pass.
You need to purchase tokens for the arcades (they’re all 1 token to play). Arcade tokens are 6 for £5 or 12 for £10
Feeling super lucky that this is practically on our doorstep and we will definitely be back again because Mr H came second in our Laser Quest game and refuses to be beaten by E!
Do you have a Laserquest near you?
#Laserquest #LaserquestKingston #LaserTag #ActivitiesForKids #ThingsToDoWithKids #FamilyFun #IndoorActivities #Kingston #DaysOutWithKids #RainyDayFun #SurreyFamilyDaysout #SurreyMummy #SurreyDaysOut #SurreyLife #SurreyMums #FamilyDaysOut #LifeWithKids #LifeWithBoys #Familyof4 #Familydayout #Familyfunday](https://storage.googleapis.com/stateless-www-suburban-mum-com/2022/11/28c60989-316091191_1767700090262610_8985686719346908962_n-180x320.jpg)
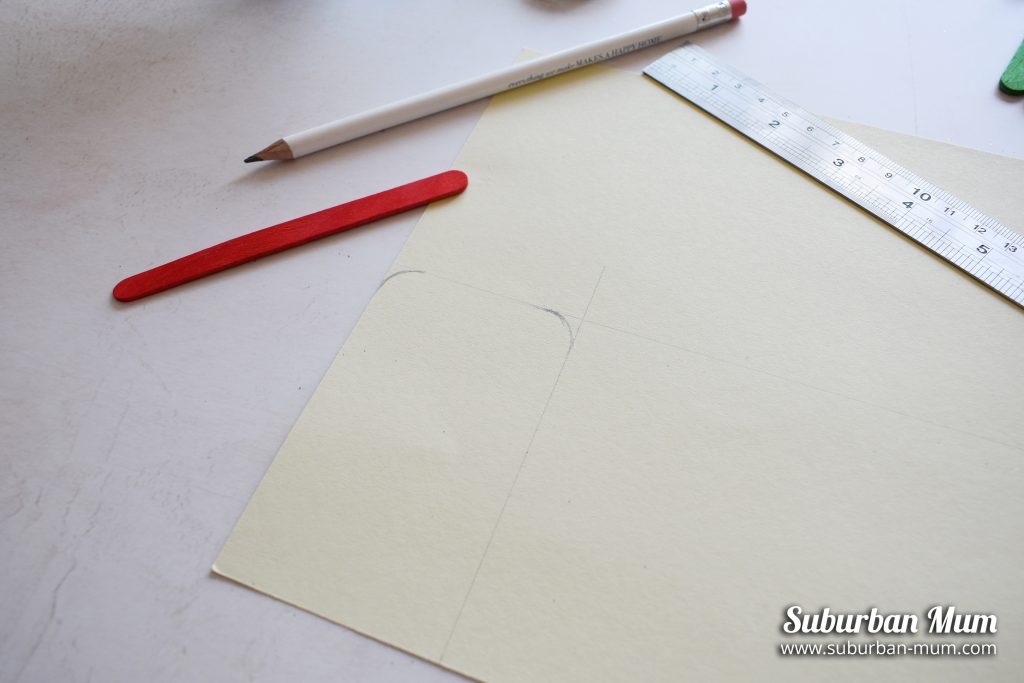
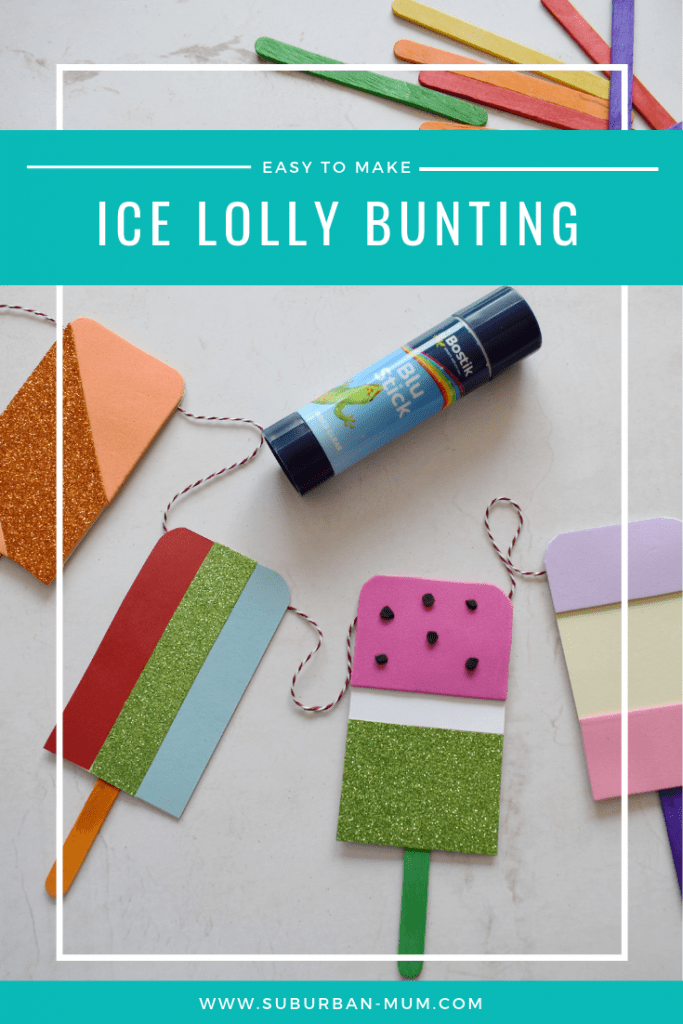
This months #BostikBlogger craft theme was aptly all about summer. While you’ll be no doubt going on lots of days out with the kids, there will also no doubt be quieter days at home too. Crafting is a great way to keep them occupied so why not give this Ice Lolly bunting a go?
How to make Ice Lolly Bunting

To create the Ice Lolly bunting will need the following:
- Lolly sticks
- Various sheets of coloured card
- String
- Bostik Blu Stick
- Scissors
- Pencil
- Ruler
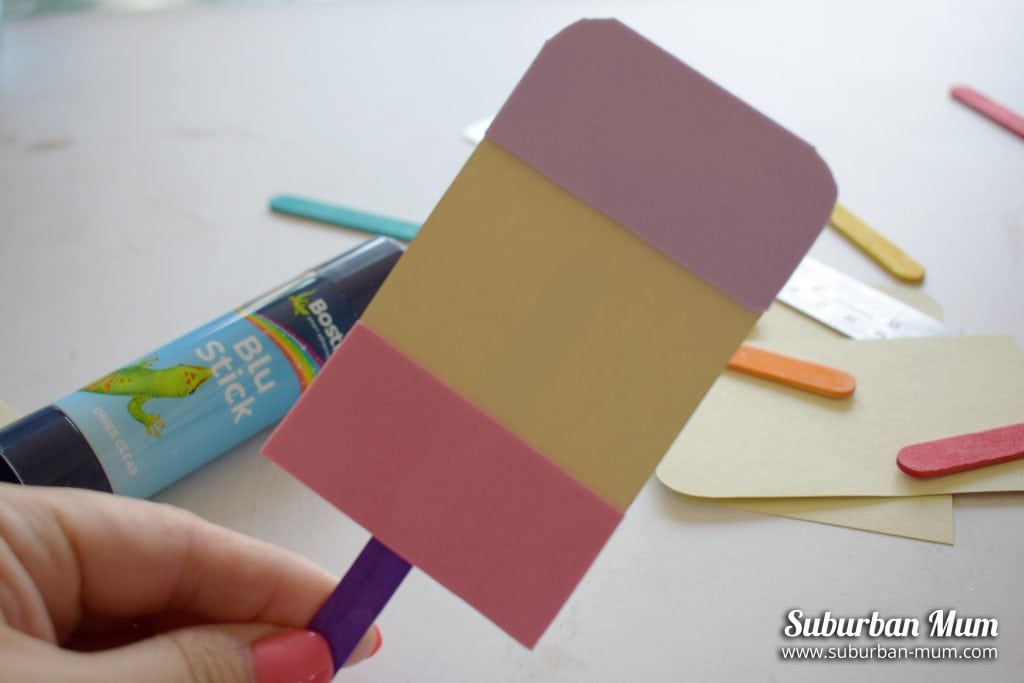
1. Take a sheet of card and draw on your lolly shapes and cut out.

2. Once you have the lolly shapes ready, you can create your own lolly design using the coloured card.
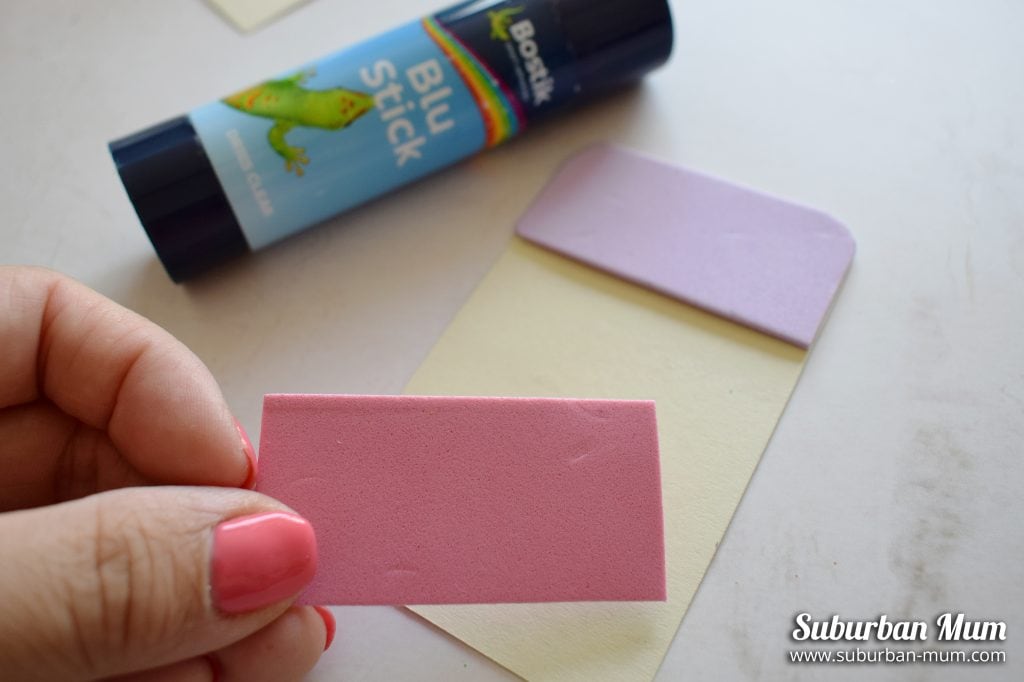
3. Cut out these pieces and stick onto your lolly base using the Blu Stick.
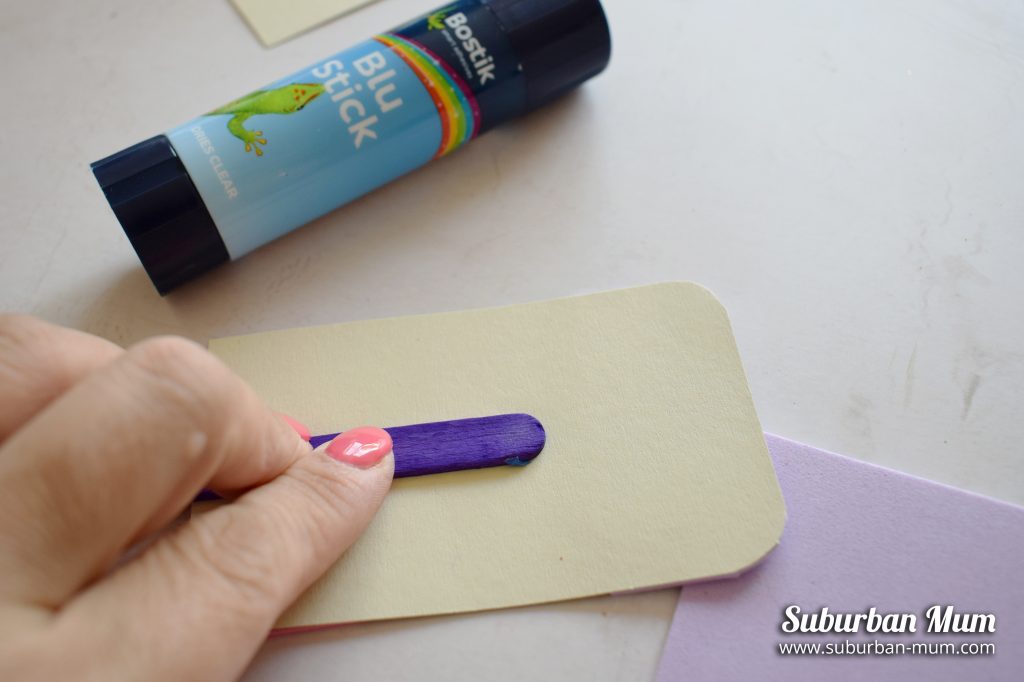
4. When you are happy with your design, take a lolly stick and apply the Blu Stick to one side and then glue onto the lolly design
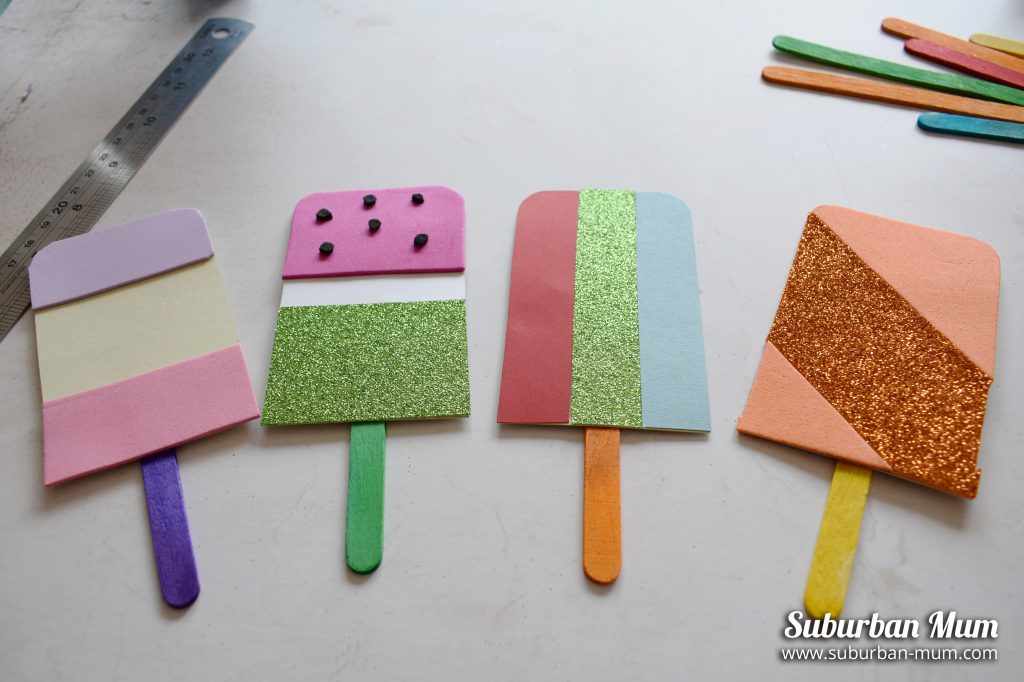
5. Create a variety of lollies – you could add texture and patterns to them using more card or buttons – anything you have in your craft box.
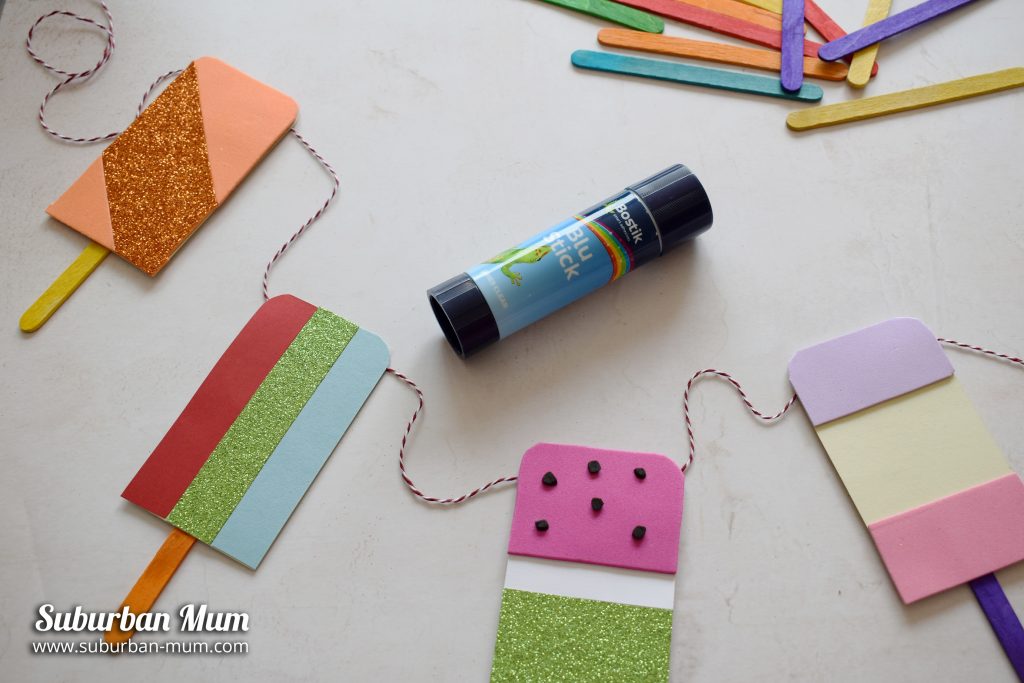
6. Once you are happy, attach some string on to the back of the lollies, making sure they are evenly spaced and hang up! This Ice Lolly Bunting would make a fab decoration for a barbecue or garden party get together. Alternatively, the kids can use these as bookmarks!
Pin it for later
*I’m a Bostik Craft Blogger and we were sent a box of crafts from Bostik in order to create these items.


![[AD] We have some super exciting news...we have been chosen to be Laser Quest Ambassadors, and the boys are over the moon!
We are really lucky that our local Laser Quest (@laserquestkingston) is just around the corner from us. It means we can pop in of a weekend or anytime during the school holidays, and with summer just around the corner, I know Laser Quest will be one of our go-to places for some family fun.
As well as games of Laser Quest, there are also VR experiences and arcade amusements too. To find out a bit more about how Laser Quest works, you can read my blog post: https://www.suburban-mum.com/laser-quest-kingston/ (clickable link in bio)
Don't forget to keep an eye out for our Laser Quest posts - I'm going to be giving away two family passes to use at Laserquest Kingston!
If you can't wait and want to head down to Laser Quest to try it out, use the code SUMMER30 for 30% off your booking. The code is valid from now until the end of August 2023 and can be used on Laser Quest games and birthday party bookings.
#LaserquestAmbassador #Laserquest #LaserquestKingston #ActivitiesForKids #FamilyFun #DaysOutWithKids #Lasertag #LaserquestVR #Kingston #ThingsToDoInKingston #SurreyFamilyDaysOut #ThingsToDoWithKids #RainyDayFun #SurreyMummy #SurreyLife #LifeWithKids #LifeWithBoys #familyfunday](https://storage.googleapis.com/stateless-www-suburban-mum-com/2024/03/8aee7c64-353230107_797358078406942_2405522556733455165_n.jpg)

![[AD] What does family look like for you?
I am fortunate to be surrounded by strong, powerful women in the form of my mum, sister and mother-in-law (along with many others). With Mother’s Day just around the corner, @BootsUK want to celebrate all the different mums and mother figures we are lucky enough to have in our lives. They have a huge range of Mother’s Day gifts to choose from so we can show them how much they mean to us. (swipe to take a look at some of my choices)
If you want to express love and appreciation for the mother figure(s) in your life, head to Boots.com to find the ideal gift. They have a whole host of gifts, so you can be sure to find something to suit all tastes. Celebrate the #LoveForAllMums this Mother’s Day with Boots.
](https://scontent-lhr6-2.cdninstagram.com/v/t51.29350-15/334276459_136658625736352_6403224988403337253_n.jpg?_nc_cat=100&ccb=1-7&_nc_sid=18de74&_nc_ohc=IIPB68Dt8tEAb4dq7eD&_nc_ht=scontent-lhr6-2.cdninstagram.com&edm=ANo9K5cEAAAA&oh=00_AfCsnbBWUzcaDogSEeiDf18N9xtl3_O0ROofOX_VdC0voQ&oe=6625BD36)
![[AD] What does family look like for you?
I am fortunate to be surrounded by strong, powerful women in the form of my mum, sister and mother-in-law (along with many others). With Mother’s Day just around the corner, @BootsUK want to celebrate all the different mums and mother figures we are lucky enough to have in our lives. They have a huge range of Mother’s Day gifts to choose from so we can show them how much they mean to us. (swipe to take a look at some of my choices)
If you want to express love and appreciation for the mother figure(s) in your life, head to Boots.com to find the ideal gift. They have a whole host of gifts, so you can be sure to find something to suit all tastes. Celebrate the #LoveForAllMums this Mother’s Day with Boots.
](https://scontent-lhr6-2.cdninstagram.com/v/t51.29350-15/334067699_956216515750432_286974433888814683_n.jpg?_nc_cat=105&ccb=1-7&_nc_sid=18de74&_nc_ohc=yVEuSl7YKOIAb6xRbdT&_nc_ht=scontent-lhr6-2.cdninstagram.com&edm=ANo9K5cEAAAA&oh=00_AfCsCM4QGpcqrbHubYOVtciQDbZ7Ods1tdOFoUJYBZI5kQ&oe=6625DBEE)
![[AD] What does family look like for you?
I am fortunate to be surrounded by strong, powerful women in the form of my mum, sister and mother-in-law (along with many others). With Mother’s Day just around the corner, @BootsUK want to celebrate all the different mums and mother figures we are lucky enough to have in our lives. They have a huge range of Mother’s Day gifts to choose from so we can show them how much they mean to us. (swipe to take a look at some of my choices)
If you want to express love and appreciation for the mother figure(s) in your life, head to Boots.com to find the ideal gift. They have a whole host of gifts, so you can be sure to find something to suit all tastes. Celebrate the #LoveForAllMums this Mother’s Day with Boots.
](https://scontent-lhr8-1.cdninstagram.com/v/t51.29350-15/334520323_227914339632366_7177231793717696790_n.jpg?_nc_cat=103&ccb=1-7&_nc_sid=18de74&_nc_ohc=toXLnSTsHWAAb6T8qSe&_nc_ht=scontent-lhr8-1.cdninstagram.com&edm=ANo9K5cEAAAA&oh=00_AfDMxNkQjjifchonTv5_XiMhGp_Rd4MSFQQ999zpLHb7vw&oe=6625C334)
Oh I love these. They look fantastic. I’m going to make this with my little ones over the summer x
Pingback: Favourite Kids Crafts from Bostik | Tots 100